
How to Run an MVP Scoping Workshop That Builds Fast
How to Run an MVP Scoping Workshop That Builds Fast
A focused MVP scoping workshop — run in three hours with the right prep — produces a buildable scope, a prioritized backlog, low-fidelity wireframes, and agreed success metrics before a single line of code is written. That is the outcome to aim for. Not a strategy deck. Not a feature wish list. A concrete, testable scope your engineering team can act on immediately.
Use this product vision template to anchor the session: “We are building [product] for [user] who needs to [job-to-be-done], so they can [outcome], and we will know it works when [measurable signal].” Fill it in together, in the room, and pin it to the wall for the rest of the day.
Before you schedule anything, run through this three-item pre-work checklist:
- Personas: At least one validated user persona with a named job-to-be-done and a specific frustration
- Problem statement: A single “How Might We” framing that the whole team agrees on
- Riskiest assumption: One explicit hypothesis the MVP must test (not “will people use it” — something falsifiable, like “users will pay $X before seeing the full feature set”)
A focused three-hour session can replace weeks of meetings when the team arrives with that prep done. The frameworks that make it work are MoSCoW prioritization for feature decisions and the Build-Measure-Learn loop from Lean Startup for structuring what you are actually testing. Tools like Figma and FigJam handle rapid wireframing and collaborative whiteboarding in the same session. Zatersio uses this exact format to move quickly from scoping to working software in a short timeframe.
Key Takeaways
A focused, timeboxed MVP scoping workshop with the right pre-work produces a buildable scope, a prioritized backlog, and testable hypotheses before any engineering time is committed.
| Point | Details |
|---|---|
| Pre-work determines quality | Arrive with a validated persona, a clear problem statement, and one named riskiest assumption or reschedule. |
| Three hours is enough | A focused 3-hour session with solid prep produces sharper outputs than a longer session without it. |
| MoSCoW plus cut-in-half | Apply MoSCoW prioritization, then cut the Must-Have list in half if it exceeds what the team can build in the target window. |
| Name the kill criterion | Define the specific signal that triggers a pivot or stop before the sprint starts, not after. |
| Zatersio for rapid builds | Zatersio moves from scoping session to working software in under two weeks, with fixed pricing and R&D documentation support. |
Table of Contents
- What is an MVP scoping workshop and when should you run one?
- Preparation and pre-work: who to invite and what to settle before the room
- Timeboxed agenda templates: 3-hour, half-day, and 48-hour formats
- Which tools make remote and in-person workshops run smoothly?
- What to leave the room with: required outputs and how to document them
- How to convert workshop outputs into a scope document and first-pass estimates
- Prioritization frameworks and voting techniques for MVP features
- Common pitfalls and a pre-workshop readiness checklist
- How Zatersio runs MVP scoping workshops: a real-world example
- What experienced facilitators learn that most guides skip
- Zatersio takes you from scoping to working software fast
- Sources
What is an MVP scoping workshop and when should you run one?
An MVP scoping workshop is a structured, timeboxed session where a cross-functional team aligns on the smallest buildable product that tests a specific, high-risk business assumption. It is not a brainstorming free-for-all. The session has a defined agenda, named outputs, and a decision-maker in the room with authority to say yes or no.
The problems it solves are specific. Without a scoping session, teams routinely start building before they have agreed on what success looks like, which user they are solving for, or which features are genuinely required versus nice to have. Scope creep starts before the first sprint. A well-run workshop eliminates those debates by forcing decisions in a controlled environment.
A productive workshop leaves the room with:
- A one-line product vision the whole team can repeat from memory
- A user journey covering the core flow end-to-end
- A prioritized feature list using MoSCoW or an equivalent framework
- Low-fidelity wireframes for the must-have screens
- Defined acceptance criteria and at least two measurable success metrics
- One named kill criterion: the number or signal that tells you to stop or pivot
When to run it: after you have validated the problem with real users but before you commit engineering time to a build. If you are still testing whether the problem exists, run user interviews first. If you already have a working product and are planning a new feature set, a lighter product discovery workshop may be more appropriate than a full scoping session. The sweet spot is the gap between “we know this problem is real” and “we are ready to build.”
Teams that skip this step tend to build a miniature version of their final product rather than a focused experiment. That distinction matters practically: a miniature final product takes months and tests nothing. A focused MVP tests one assumption in weeks.
Preparation and pre-work: who to invite and what to settle before the room
The quality of a scoping workshop is decided before anyone walks in. Thorough pre-session framing and stakeholder mapping are the difference between a productive session and a confusing one. Treat the prep as non-negotiable.

Who belongs in the room
Keep the group between five and eight people. Fewer than five and you miss critical perspectives; more than eight and the session becomes a committee meeting. Every participant must have a defined role and a specific contribution to make.
| Role | Minimum or Ideal | What they must bring |
|---|---|---|
| Product manager / founder | Required | Problem statement, user research summary, OKRs |
| Lead engineer | Required | Technical constraints, rough feasibility read |
| Designer / UX | Required | Persona summaries, any existing journey maps |
| Business stakeholder | Required | Budget authority, commercial success criteria |
| QA or delivery lead | Ideal | Acceptance criteria input, risk flags |
| Domain expert / advisor | Ideal | Market context, regulatory notes if relevant |
One rule applies without exception: the person with budget authority must be present and empowered to make decisions in the room. A scoping workshop that ends with “we need to check with [absent person]” has not produced a scope.
Pre-work to distribute at least 48 hours before
Send participants a one-page pre-read that includes the validated persona, the “How Might We” problem statement, any relevant user research findings, and the key metrics or OKRs the product must move. Ask each participant to arrive with three feature ideas written down and one assumption they believe is the riskiest.
Pre-session readiness checklist:
- Problem statement drafted and shared
- At least one validated persona circulated
- Key metrics or OKRs defined
- Riskiest assumption named in writing
- Agenda sent with timeboxes and expected outputs
- Collaboration tool set up (board, templates loaded)
- Decision-maker confirmed as attending
If more than two items on that checklist are unchecked 24 hours before the session, reschedule. Running a scoping workshop on insufficient prep wastes everyone’s time and produces a feature list nobody trusts.
Timeboxed agenda templates: 3-hour, half-day, and 48-hour formats
Pick the format based on how much prep the team has done and how complex the product domain is. MoSCoW prioritization and a cut-in-half rule work across all three formats — the difference is how much synthesis time you have between activities.
3-hour rapid alignment session
Best for: teams with solid pre-work done, a clear problem statement, and a single core user flow to scope.
- 0:00–0:20 — Vision alignment: Facilitator reads the product vision template aloud. Team fills in any blanks together. Output: agreed one-line vision pinned to the board.
- 0:20–0:45 — User journey walk: Map the core user flow end-to-end on a whiteboard or FigJam board. Keep it to the happy path only. Output: a six-to-eight step journey map.
- 0:45–1:15 — Feature generation: Each participant writes features on sticky notes (one per note, two minutes silent). Cluster duplicates. Output: raw feature list, grouped by journey step.
- 1:15–1:45 — MoSCoW prioritization: Vote on Must/Should/Could/Won’t using dot voting. Apply the cut-in-half rule: if more than half the features land in “Must,” cut again. Output: prioritized feature list.
- 1:45–2:15 — Low-fi wireframes: Designer sketches the three to five must-have screens while the engineer flags technical constraints in parallel. Output: rough wireframes and a constraints list.
- 2:15–2:45 — Assumptions and metrics: Name the riskiest assumption, set two success metrics, and define one kill criterion. Output: assumptions log and metrics card.
- 2:45–3:00 — Wrap and next steps: Assign synthesis owner, confirm 24-hour deadline for scope draft, and name who reviews it. Output: action list with owners.
Half-day session (4 hours)
Add a 30-minute research debrief at the start (share user interview clips or survey data), extend the wireframing block to 45 minutes, and include a 20-minute stakeholder Q&A before the assumptions step. The extra time pays off in wireframe fidelity and fewer open questions in the scope doc.
48-hour deep discovery sprint
Use this format when the domain is complex, the team has not done prior user research, or the product involves regulatory constraints. Day one covers problem framing, user research synthesis, and journey mapping. Day two covers feature prioritization, wireframing, estimation, and scope documentation. Airfocus recommends alternating individual reflection, small-group work, and collective debriefs across both days to prevent cognitive overload and keep outputs sharp.
For distributed teams: run the feature generation and MoSCoW voting asynchronously the day before the live session using a shared Miro or Mural board. This cuts 45 minutes from the live agenda and means the team arrives with a pre-clustered feature list ready to vote on.
Pro Tip: Apply the cut-in-half rule ruthlessly. After your first MoSCoW pass, count the Must-Have features. If the number exceeds what your team could realistically build in four to six weeks, cut the list in half again. The goal is not a complete product — it is the smallest thing that tests your riskiest assumption.
Which tools make remote and in-person workshops run smoothly?
The right toolset removes friction from the session so the team focuses on decisions, not logistics. For remote sessions, you need a collaborative whiteboard, a prototyping layer, a voting mechanism, and a visible timer. For in-person, physical sticky notes and a whiteboard work fine — but a digital backup saves the outputs.
Recommended toolset by use case:
- FigJam (Figma): Best for remote whiteboarding, sticky note clustering, and lightweight wireframing in the same tool. Designers can move directly from the FigJam board into a Figma file for higher-fidelity screens without switching context. Ideal for the journey mapping and wireframing blocks.
- Miro: Strong for structured templates — journey maps, impact/effort matrices, and retrospective formats are all available out of the box. The voting plugin handles dot voting natively, which saves setup time during the MoSCoW block.
- Mural: Similar to Miro with a slightly different facilitation model. MURAL’s Facilitation Superpowers feature lets the facilitator lock and unlock sections of the board, which is useful for keeping participants focused on one activity at a time during a fast-paced session.
- airfocus: Purpose-built for feature prioritization and roadmap planning. Use it after the workshop to formalize the MoSCoW output into a tracked backlog rather than as a live workshop tool. It connects prioritization decisions to strategic objectives, which makes the scope doc easier to defend.
For collaborative group workflows and risk assessment during the scoping session itself, SwarmStack’s human-plus-AI framework offers a structured approach to parallel workstreams — useful when engineering and design are working simultaneously on different parts of the board.
Facilitation checklist:
- Timer visible to all participants (use a shared screen or a physical timer)
- Parking lot section on the board for out-of-scope ideas (prevents derailment)
- Engineer and designer paired on the wireframing block, not working in sequence
- Synthesis cadence: brief debrief after each block (two minutes maximum)
- One facilitator who is not also a decision-maker
Pro Tip: For remote sessions, enforce a camera-on rule for the first 30 minutes only — after that, let it be optional. Mandatory cameras for a three-hour session cause fatigue. Instead, use a 90-second micro-break every 45 minutes and a quick emoji reaction check-in to gauge energy. Async pre-work (feature brainstorm, persona review) done the day before cuts live session time by 30–40 minutes and arrives with higher quality thinking.
What to leave the room with: required outputs and how to document them
Standard workshop deliverables include a prioritized feature list, wireframes or storyboards, and initial budget and timeline estimates. Those three are the floor, not the ceiling. A well-run session produces more.
Core deliverables checklist:
- One-line product vision (filled-in template from the opening block)
- User journey map (happy path, six to eight steps, annotated with pain points)
- Prioritized feature list (MoSCoW matrix with Must-Have features clearly separated)
- Low-fidelity wireframes (three to five screens covering the must-have flow)
- Acceptance criteria (one to two sentences per must-have feature defining done)
- Success metrics (two measurable signals, e.g., activation rate and task completion time)
- Kill criterion (the specific number or event that triggers a pivot or stop decision)
- Assumptions log (list of testable hypotheses ranked by risk)
Scope document structure
Fill this immediately after the session while context is fresh:
| Section | What to include |
|---|---|
| Product vision | One-line statement from the workshop |
| Problem statement | “How Might We” framing agreed in pre-work |
| Target user | Persona name, job-to-be-done, key frustration |
| Must-Have features | Feature name, acceptance criteria, linked assumption |
| Out-of-scope items | Features explicitly deferred with a reason |
| Success metrics | Two KPIs with baseline and target values |
| Kill criterion | Specific signal and decision owner |
| Assumptions log | Ranked list of hypotheses to test |
| Open questions | Items requiring follow-up before sprint start |
Store the scope document in a shared drive with edit access for the core team and read access for all stakeholders. Link it from your project management tool (Jira, Linear, or Notion work well) so it becomes the single source of truth. Every ticket in the first sprint should trace back to a must-have feature in this document.
How to convert workshop outputs into a scope document and first-pass estimates
The synthesis owner — usually the product manager or lead facilitator — has 24 to 72 hours after the session to convert sticky notes and whiteboard photos into a clean scope document. Speed matters here. Waiting longer than 72 hours means context fades and decisions get relitigated.
Recommended follow-up workflow:
- Hours 0–4: Export all board content, photograph physical artefacts, and send a raw summary to all participants
- Hours 4–24: Synthesis owner drafts the scope document using the structure above
- Hours 24–48: Engineering lead reviews must-have features and adds first-pass estimates
- Hours 48–72: Stakeholder review and sign-off; open questions resolved or parked with owners
First-pass estimation methods
| Method | Best for | Output |
|---|---|---|
| T-shirt sizing (XS/S/M/L/XL) | Early-stage, high uncertainty | Relative effort buckets for each feature |
| Story point proxy | Teams familiar with agile velocity | Rough sprint count per feature cluster |
| Engineering rough hours | Fixed-price quoting, R&D documentation | Hour range per feature with named assumptions |
T-shirt sizing is fastest and works well when the team has not built together before. Story points work when you have a known velocity from a previous sprint. Engineering rough hours are the most useful for first-pass cost estimates and for structuring R&D documentation.
Assumptions that must be recorded and treated as testable hypotheses:
- Technology stack and hosting environment (assumed, not confirmed)
- Third-party API availability and rate limits
- User volume in the first 90 days
- Regulatory or compliance requirements
- Data residency requirements (especially relevant for Australian projects)
- Integration dependencies with existing systems
Pro Tip: Every estimate is an assumption. Write the assumption next to the number. “Feature X will take 12 hours, assuming the payment API has a sandbox environment and no custom authentication is required.” That sentence is worth more than the number alone — it tells the team exactly what to validate before the sprint starts.
Prioritization frameworks and voting techniques for MVP features
The goal of prioritization is not to rank every feature. It is to identify the smallest set that tests the riskiest assumption. Scoping the MVP to test one riskiest assumption and setting numeric kill criteria before shipping is the discipline that separates a focused experiment from a bloated build.
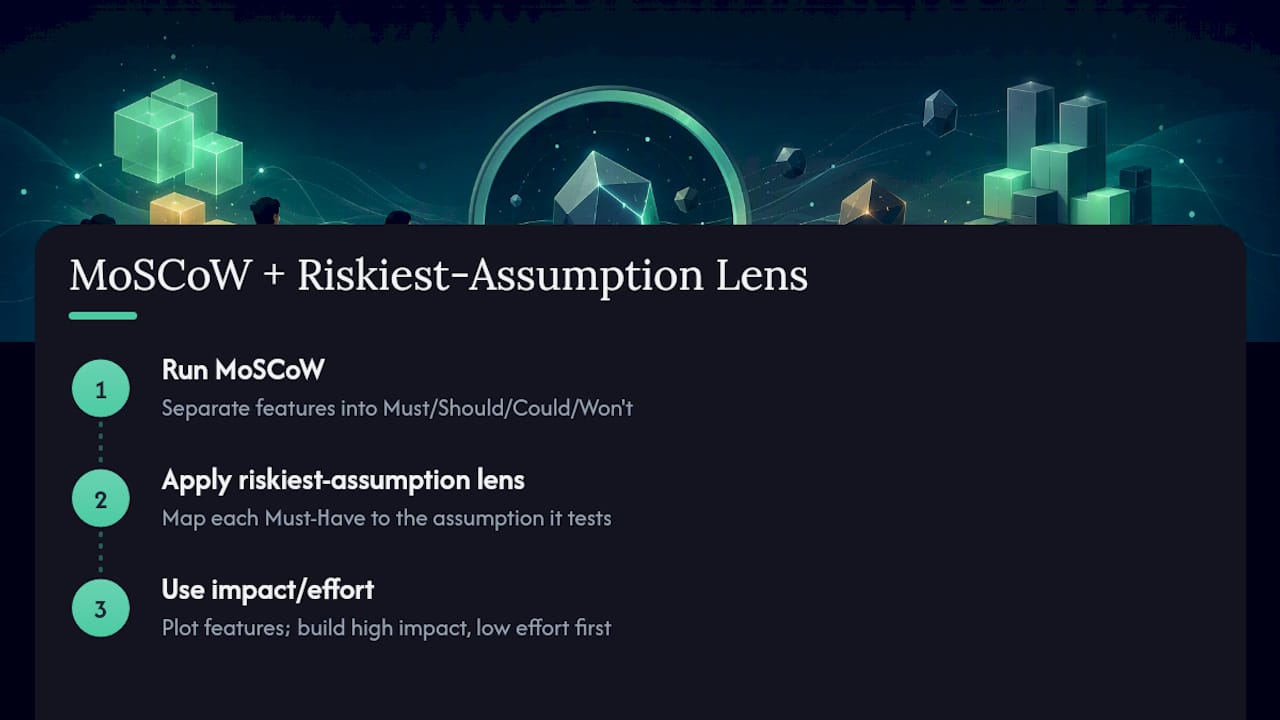
Recommended primary framework: MoSCoW plus the riskiest-assumption lens
Run MoSCoW first to separate features into four buckets. Then apply a second pass: for every Must-Have feature, ask “which assumption does this test?” If a feature does not map to the riskiest assumption or a table-stakes requirement, move it to Should-Have or defer it entirely.
Pair MoSCoW with an impact/effort matrix when the Must-Have list is still too long after the first pass. Plot features on a two-by-two grid (high impact/low effort in the top-left quadrant gets built first). This combination handles both strategic alignment and practical feasibility in one pass.
Voting techniques
- Dot voting: Each participant gets five dots to place on features they believe are essential. Tally the dots. Features with zero dots are immediate candidates for deferral. Fast, visual, and democratic — works well for groups of five to eight.
- Weighted votes: Assign different vote weights by role (e.g., the business stakeholder’s vote counts double for commercial features; the engineer’s vote counts double for technical feasibility). Useful when the team has strong domain asymmetry and you want to prevent a single loud voice from dominating.
Decision criteria for a Must-Have feature:
- Without it, the core user journey cannot be completed
- It directly tests the riskiest assumption
- It is technically feasible within the target sprint window
- Removing it would make the product untestable or unshippable
The cut-in-half rule in practice: after your first MoSCoW pass, count the Must-Have features. If the number is more than what the team can build in the target timeframe, apply the rule: cut the list in half by asking “if we could only ship half of these, which half?” Repeat until the list is buildable. This forces the team to make real trade-offs rather than labeling everything critical.
The “one riskiest assumption” test is the final filter. Before closing the prioritization block, ask: “Does this feature list, as it stands, give us enough to test our single riskiest assumption?” If yes, you are done. If no, identify what is missing and add only that.
Common pitfalls and a pre-workshop readiness checklist
Most scoping workshops fail for the same reasons, and almost all of them are preventable with preparation.
Common pitfalls:
- Over-scoping: The team labels too many features as Must-Have because no one wants to be the person who cut something. Apply the cut-in-half rule before closing the prioritization block.
- Missing decision-makers: A workshop without budget authority in the room produces a wish list, not a scope. Confirm attendance before scheduling.
- Insufficient pre-work: Arriving without a validated persona or a clear problem statement means the first hour of the session is spent on work that should have been done the week before.
- Building a miniature final product: Every feature added beyond the riskiest-assumption test makes the MVP slower, more expensive, and less informative. The most common pitfall is treating the MVP as a small version of the full product rather than a focused experiment.
- No synthesis owner: If nobody owns the scope document after the session, the outputs stay on a whiteboard and the team reconvenes two weeks later with no shared memory of what was decided.
- Facilitator who is also a stakeholder: When the person running the session also has a strong opinion on the outcome, the group follows their lead rather than making independent decisions. Separate the roles.
Pre-workshop readiness checklist:
- Problem statement written and agreed
- Validated persona circulated to all participants
- Riskiest assumption named in writing
- Decision-maker confirmed as attending
- Agenda sent with timeboxes and expected outputs
- Collaboration tool set up with templates loaded
- Synthesis owner named before the session starts
- Kill criterion discussed in pre-work (even a rough version)
Pro Tip: If a session is badly prepared and you cannot reschedule, spend the first 20 minutes on a rapid problem-framing exercise: each participant writes the problem in one sentence, reads it aloud, and the group votes on the most accurate version. It is not ideal, but it gives the session a shared foundation to work from instead of letting everyone operate from a different mental model.
How Zatersio runs MVP scoping workshops: a real-world example
Zatersio’s approach to scoping is built around one constraint: working software in under two weeks for rapid builds. That timeline is only achievable when the scope is locked before engineering starts, which means the scoping session has to produce a clean, unambiguous scope document — not a list of ideas to refine later.
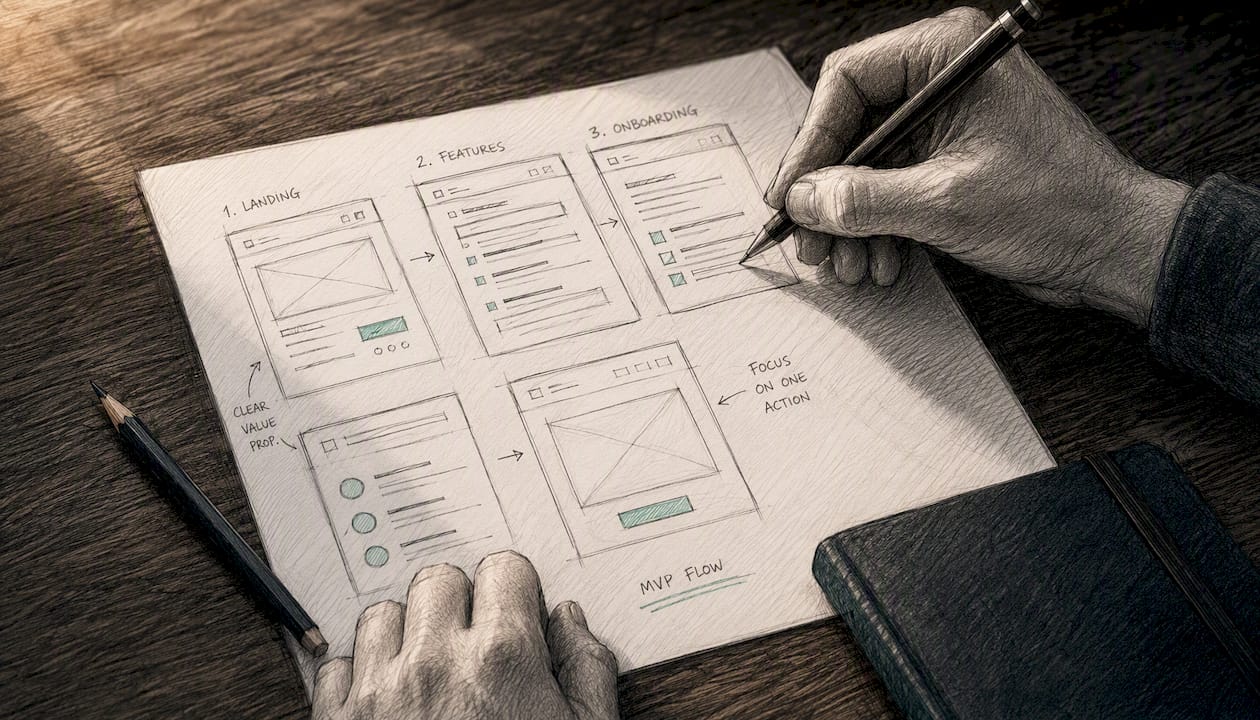
A typical Zatersio engagement starts with a structured scoping session that produces a fixed-price scope, a prioritized backlog, and a clear R&D readiness assessment. From that session, the team moves directly into a sprint. No extended discovery phase, no iterative scope negotiation.
Sample timeline from scoping to first sprint:
| Phase | Duration | Output |
|---|---|---|
| Pre-work and stakeholder prep | 2–3 days | Persona, problem statement, riskiest assumption |
| Scoping session | 3 hours to half-day | Scope doc, wireframes, prioritized backlog |
| Synthesis and sign-off | 24–48 hours | Fixed-price quote, R&D documentation checklist |
| Engineering sprint 1 | Up to 2 weeks | Working software, testable against kill criterion |
R&D readiness checklist (for Australian projects):
- Scope document with technical objectives and experimental hypotheses recorded
- Engineering logs capturing decisions, iterations, and technical uncertainty
- Assumptions log from the scoping session (treated as documented hypotheses)
- Feature-level acceptance criteria tied to measurable outcomes
- Data residency requirements noted (Australian data residency available through Zatersio)
Zatersio delivers fixed-price MVP builds with direct engineering team access, Australian data residency options, and R&D Tax Incentive structuring support for eligible projects. For teams exploring whether their build qualifies, the R&D Tax Incentive guide covers the documentation requirements in detail.
Pro Tip: Start your R&D documentation at the scoping session, not after the build. The assumptions log and the riskiest-assumption statement from the workshop are exactly the kind of documented experimental hypotheses that support an R&D claim. Capture them in writing on the day, with dates.
What experienced facilitators learn that most guides skip
Preparation wins every time. Not better facilitation technique, not a smarter framework, not a longer session. The single biggest predictor of a useful scoping output is whether the team arrived with a validated persona, a clear problem statement, and a named riskiest assumption. Everything else is secondary.
The tradeoff between speed and fidelity is real, but it is usually misread. Teams assume a three-hour session produces lower-quality outputs than a two-day sprint. In practice, the three-hour session often produces sharper outputs because the time constraint forces decisions. A two-day session without tight timeboxes tends to produce longer feature lists and more open questions, not better ones. The constraint is the feature.
On participant count: five is the sweet spot. Six works. Seven is manageable. Eight is the ceiling. Every person added beyond five increases the time spent on consensus and decreases the time spent on synthesis. For use-case prioritization specifically, a smaller group with strong domain knowledge outperforms a larger group with mixed expertise every time.
What founders and PMs consistently underestimate:
- The riskiest assumption is almost never the one the team names first. Ask “what would have to be true for this to fail?” and work backward.
- Wireframes from a scoping session do not need to be good. They need to be shared. A rough sketch that everyone has seen is worth more than a polished mockup one person made alone.
- The kill criterion is the most skipped output in every workshop. Teams are optimistic and do not want to name the number that ends the project. Name it anyway. It is the most honest thing the session produces.
- After the workshop, the scope document is only as useful as the person who owns it. Assign a synthesis owner before the session ends, not after.
Zatersio takes you from scoping to working software fast
Running a great scoping session is one thing. Having the engineering capacity to act on it immediately is another. Zatersio is built for founders and product teams who need both: a structured scoping process and a rapid build that follows it without delay.
When you need working software in under two weeks, limited internal engineering capacity, or a build structured for R&D Tax Incentive eligibility, Zatersio is the direct path from scope to shipped. The engagement covers workshop facilitation, a fixed-price scope document, a two-week engineering sprint option, and full R&D documentation support for eligible Australian projects. No retainer, no long-term lock-in, and no ambiguity about what you are paying for.
For teams building MVPs that include AI automation, voice agents, or workflow automation, Zatersio’s engineer-built MVP service handles the full stack from scoping to deployment. Book a discovery call to confirm scope, get a fixed-price quote, and start the build.
Sources
These resources go deeper on specific methods covered in this article: